Crockpot Rice Krispie Squares

Spring has arrived!  And it brought a snowstorm with it… and a snow day.  So we’re home in our PJs today.  We made some crockpot rice krispie squares today, and let me tell you, are they ever easy!  You use the recipe on the box, and here’s what you do:

Put your butter in first (I use margarine):

crockpot rice krispie squares

Then you add the marshmallows (the recipe calls for 40, but I put in 50, because I like ’em gooey):

crockpot rice krispie squares

I added vanilla at this point, and then covered the whole thing with the rice krispies:

crockpot rice krispie squares

Note: this the the 4L insert for my slow cooker.  If you have a smaller slow cooker, you will need to adjust the recipe.  At this point, I turned it on low and let it cook for about 50 minutes.

If it looks like this after stirring, it’s ready!

IMG_6960

If the marshmallows haven’t all melted yet, leave it for another 20 minutes or so.

IMG_6961

After you get it stirred, press it down into a GREASED 9×13 pan.  I used a piece of parchment paper to keep my fingers from getting sticky.

IMG_6962

And then enjoy!  Yum yum!

crockpot rice krispie squares

Butterscotch Pie Recipe

Happy Pi Day!  It’s March 14 (or 3.14), and I like to celebrate by all things Pi… or pie… the latter tends to taste a little better.

Chicken Pot Pie

First we started with some chicken pot pie, then I made a butterscotch pie.  The pie was a collaboration between two grandmothers.  The recipe came from my husband’s grandmother’s cookbook.  He has it photocopied and stored, and has notes on some of the recipes, like “Dad likes this”, etc… but next to the butterscotch pie is “Sandy’s Fav!!!”  The extra exclamation points are for dramatic effect, I guess.  Here’s the recipe:

Butterscotch Pie

  • 1 c brown sugar
  • 1 tbsp corn starch
  • butter the size of an egg
  • yolks of 2 eggs (reserve whites for meringue)
  • 1 tsp vanilla
  • 2 cups milk
  • dot a little salt if desired
  • up to 1/2 c sugar for meringue

And that’s the recipe.  No directions or anything.  After talking to my grandmother, this is what I could come up with:

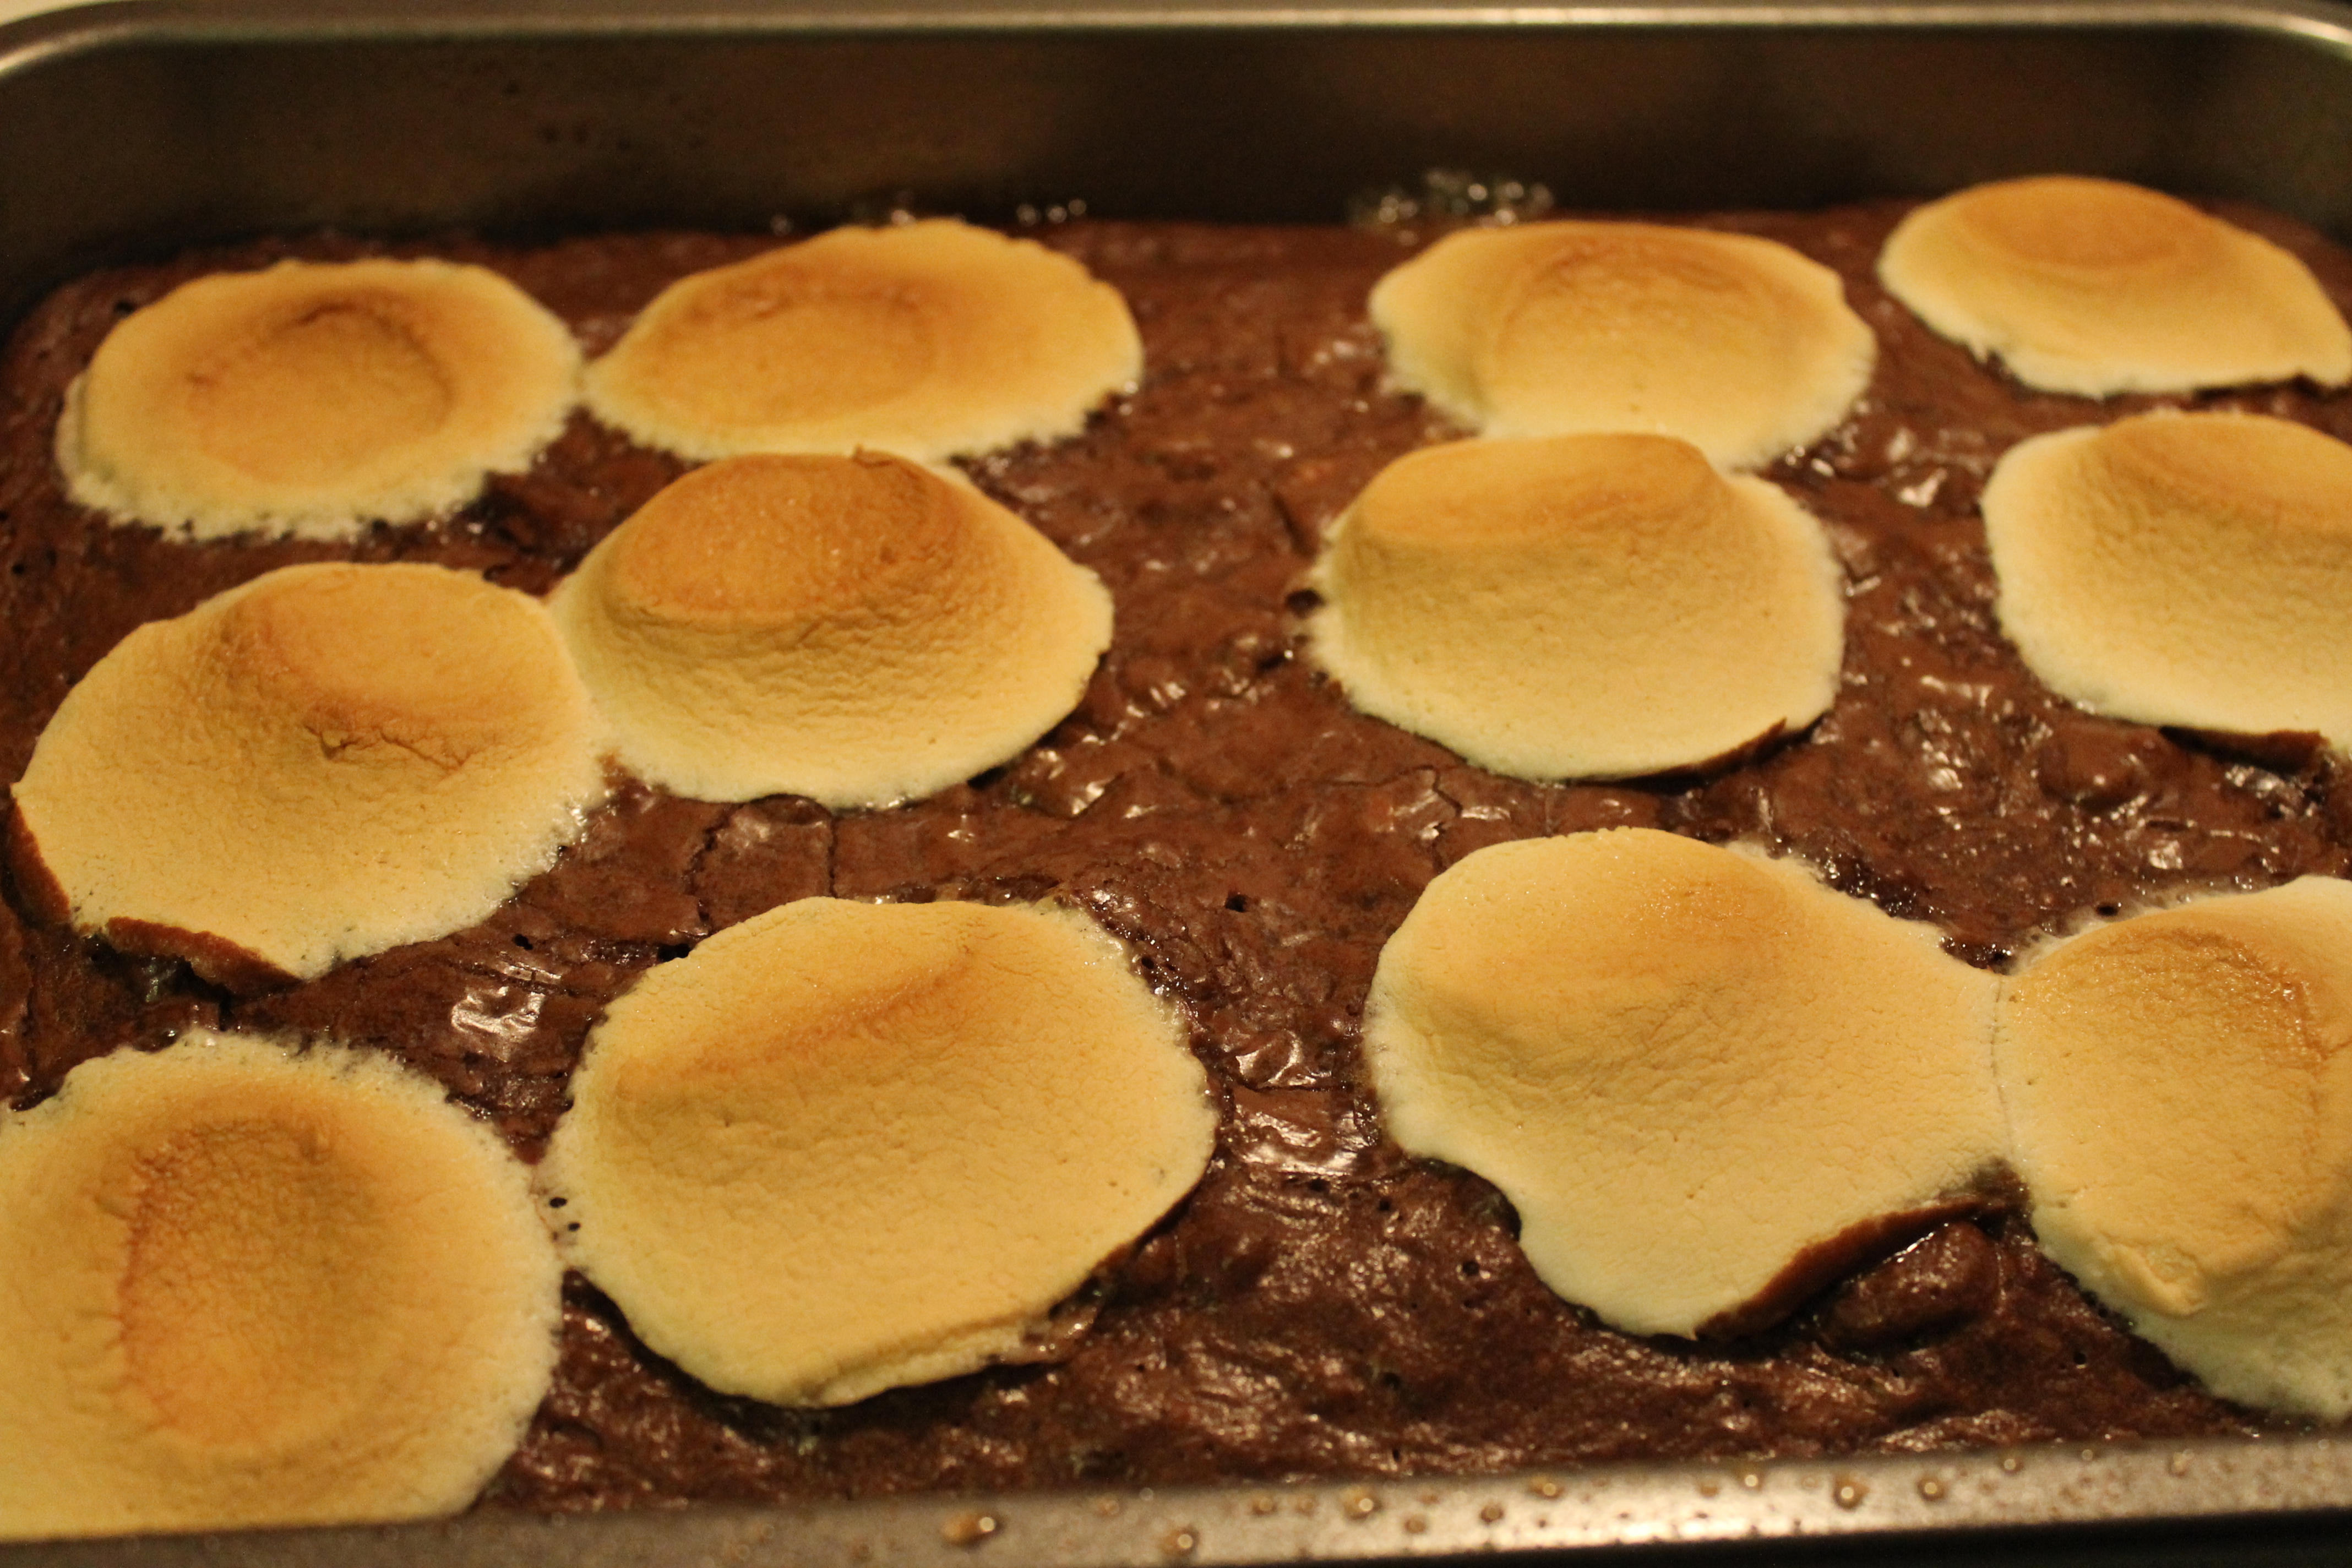
Combine your pie ingredients into a microwave safe bowl.  On about 70% power, microwave until it starts to boil, stirring every few minutes.  Once it starts to boil and thicken, stir it and return to the microwave for another few minutes.  It should look like this:

Butterscotch Filling

For the meringue, it works better if the whites have aged.  If you can’t age them for a day or so, at least wait 30 minutes.  They turn out much better if they are at room temperature (**note** cold eggs separate more easily than warm ones, so do that first, and then leave the whites to set for a bit).  Being by beating the eggs until they get foamy, then gradually add up to 1/2 c sugar (1/4 c for each white).  You may not need all that sugar.  The meringue is ready when peaks form.

Now… because I worked all day today, I didn’t make my own pie crust.  I bought frozen.  Normally, you just throw the pie in the over at 350° until the meringue browns.  However, it didn’t quite work out for me today.  I had more of a butterscotch pudding than a pie.  I am going to try it again this weekend, and let you know what changes need to be done.  If I remember correctly from the last time I made the pie, I doubled the amount of cornstarch in the recipe.

IMG_6956

At least someone liked the pudding.

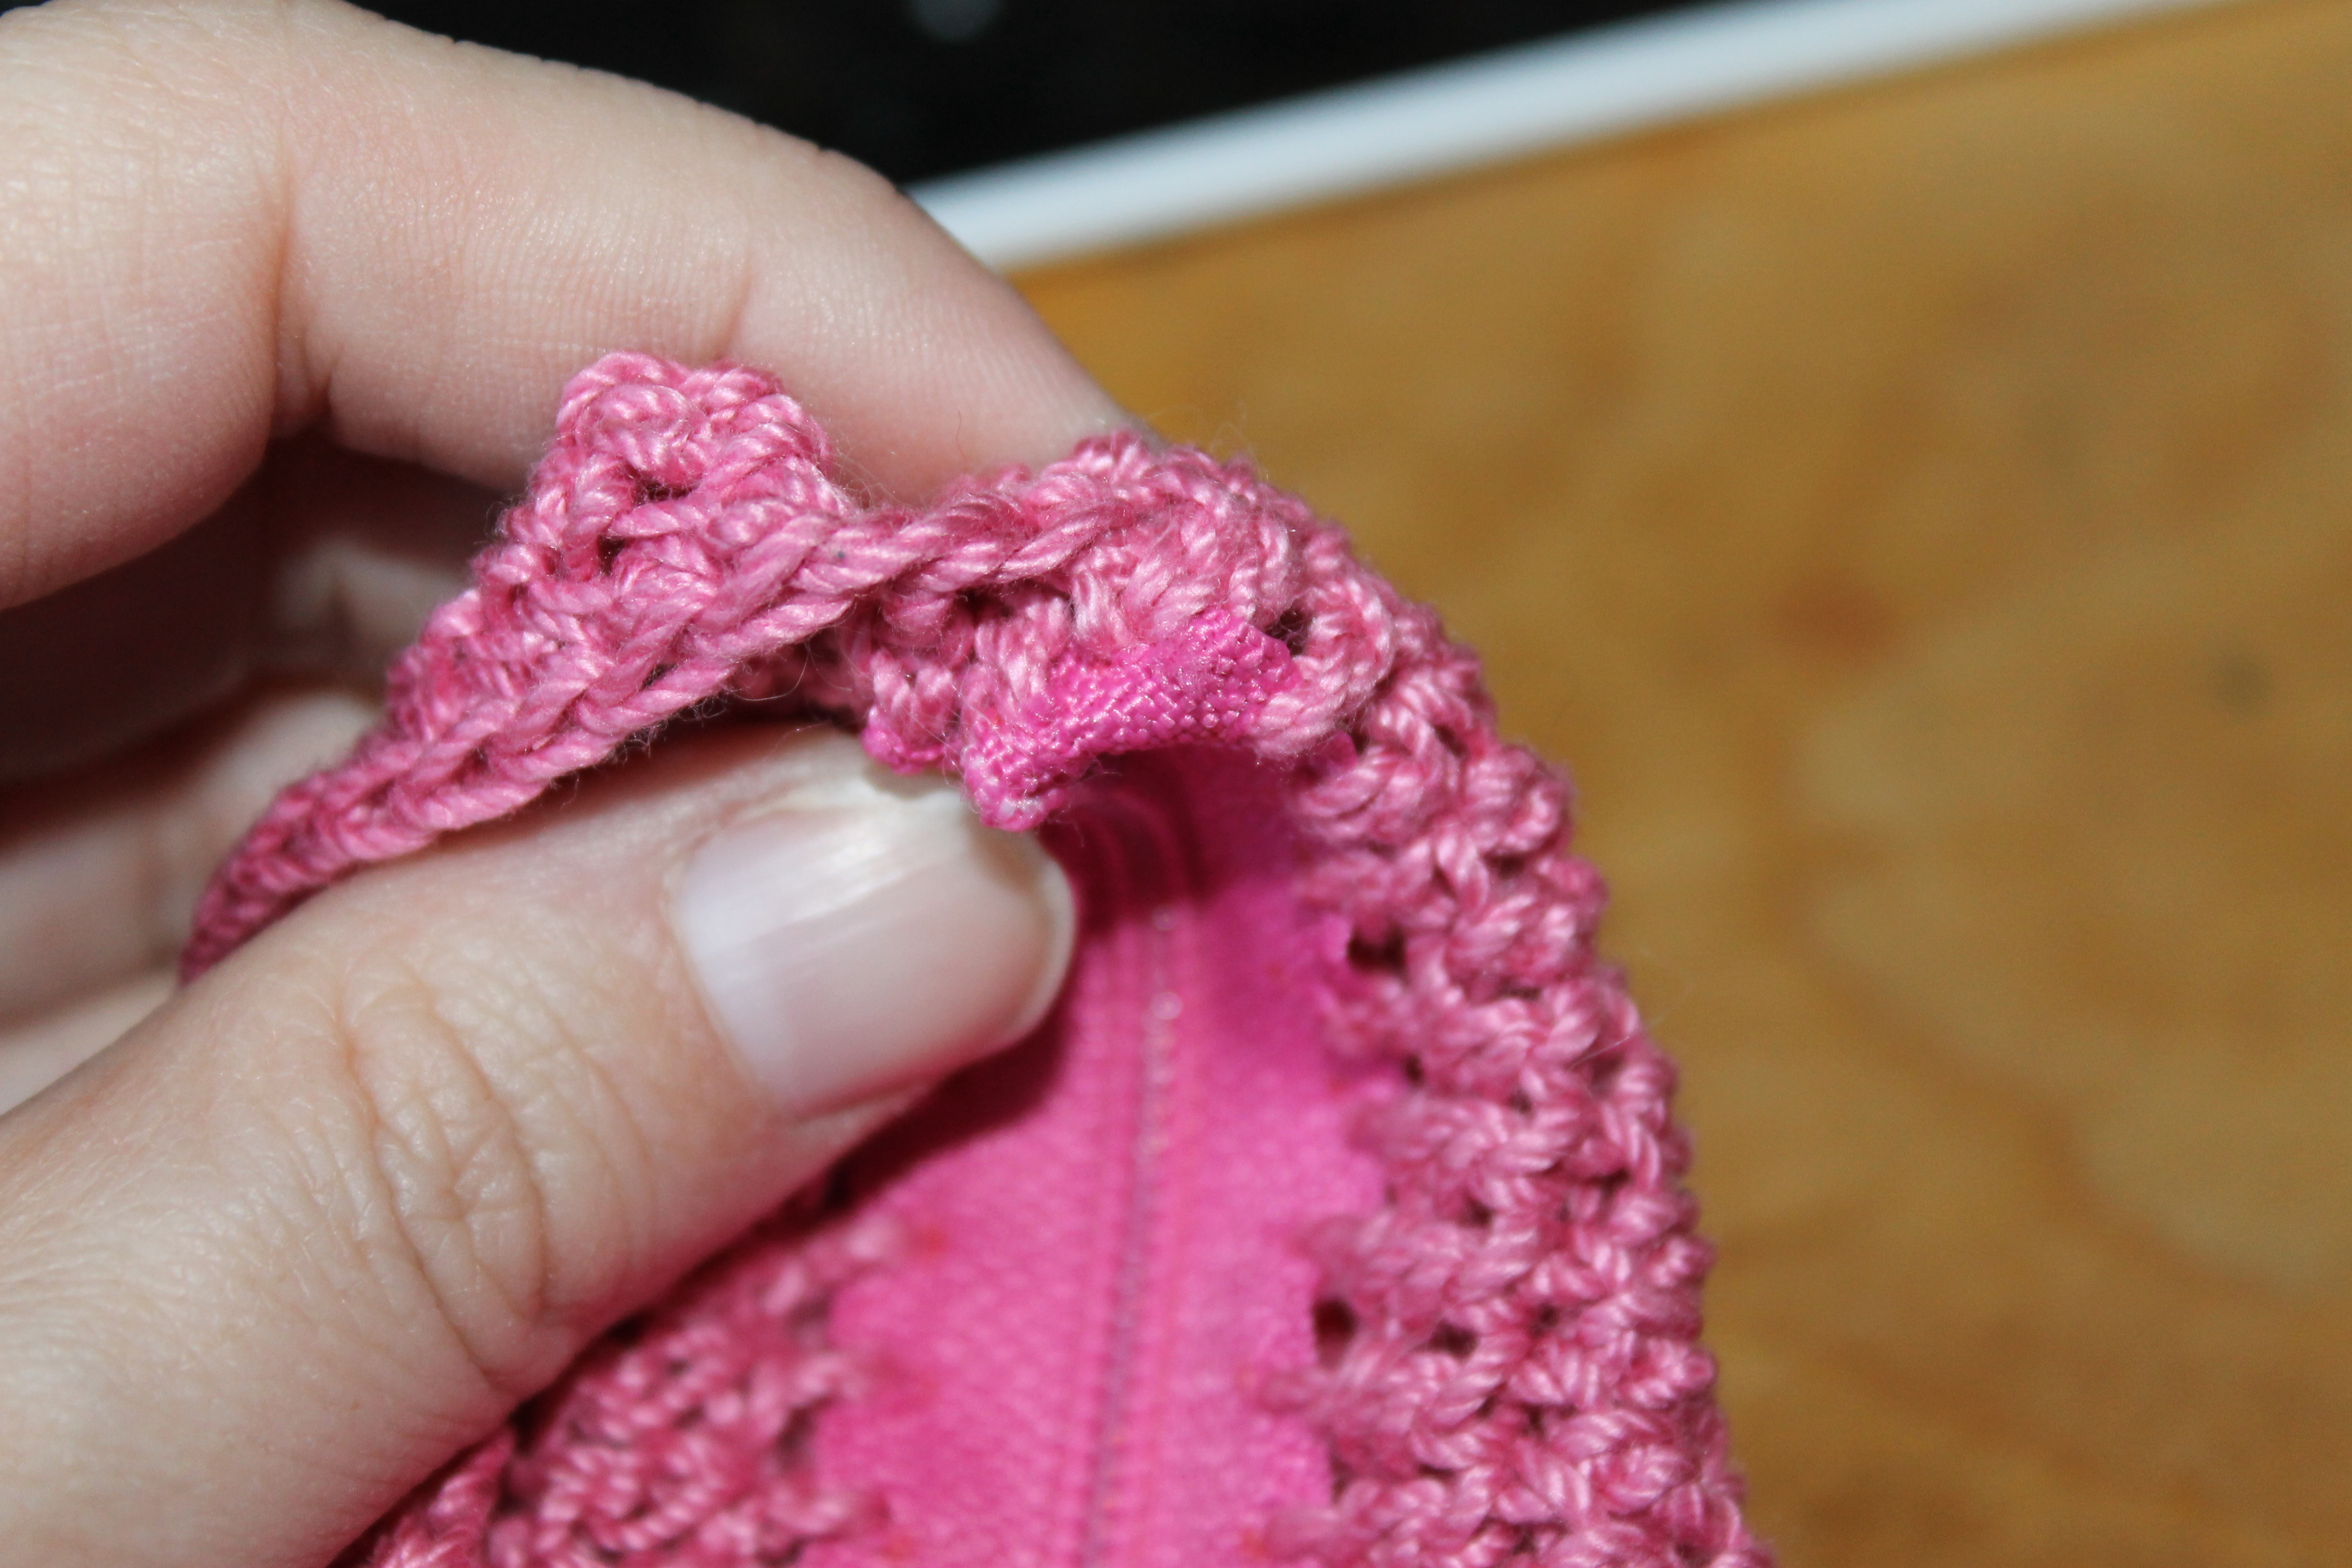
And as an extra little tidbit… here’s a sneak peak of what I’m currently knitting.  It’s an entrelac baby blanket for our new arrival in a few months’ time.  I’m really excited, because it’s coming together nicely!

Entrelac baby blanket

I hope you enjoyed your pi (pie) day.  What’s your favourite kind of pie?


Pretty Pink Purse

I finally got around to using my sharp crochet hook.  I ordered my kit just after Christmas, and was itching to get started on a project.  I started this purse, and finished it today!  It only took a break from school to get it finished…

Crochet Pink Purse

How the sharp crochet hook works is pretty neat.  I plan on making another one of these purses, now that I know what I’m doing, and I’ll show you everything up close.  I had taken pictures of the work in progress, but they were lost.  So for now, I’ll just have to give you the pattern.

Crochet Purse

Using your sharp hook, crochet right into the zipper.  I used a 7″ zipper for this pattern, but you could easily use anything longer or smaller.  I made an hdc every 1/4″, plus two extra at each end.  This meant that I had 32 across.  (I had originally used a sc, but it pulled it too tight, hdc worked much better.)

At the each of the 4 corners, I made 3hdc in the same hole to give a little bit of turning space.

Crochet Purse

Then I added one more hdc on either side of the zipper.  In total, it was 76 hdc around.  I alternated 1 row hdc with 1 row dc for 16 rows.  Then I sewed the bottom up.  For the handle, I made a chain that looked ‘long enough’, by holding it to where I wanted it placed on either end of the zipper.  Then I added two rows of dc to give it the width it needed.

This was definitely an easy project, and great for anyone who wants to try out the sharp crochet hook.

For ordering, you can check out the website here.  I will mention that it came in good time, I think it took 15 days from the day I ordered it, and because the exchange rate is so good right now for Canadians, the price you see on the page is almost the price you pay, plus the charge for shipping internationally.

Booties, and Blankets, and Birthdays, oh my! And lots of other things…

Saturday was a very busy day in our household.  Hubby took our son for a drive in the morning.  They went out for breakfast and then went ‘topping’ (shopping, to my two-year-old son).  Once they got home, my son and I hit the road again.  First we went to a baby shower.  Here’s a few shots of the gifts that I made my friend:

Cow Beanie and Booties Cuffed Baby Booties

Here is a link to the bootie pattern, and you can check out my previous post on the hat (also includes a link to the full pattern).  This was my first time making booties, and I’m very pleased with how they turned out.  If you check out the site where I got the pattern from, she also includes a video tutorial on how to make the sole of the bootie, to help you out.

After the shower, we went to a second birthday party for a little girl who lives up the road from us.  We arrived a little late, because the shower and the party were at the same time, but we also stayed later because the two kiddies were having a great time playing with her new toys.

Another exciting thing happened on Saturday:

parcel

A parcel arrived in the mail for me!  Actually, it arrived Friday, but we could only get to the post office on Saturday morning.  Isn’t it great when you get something in the mail?  Even though I knew exactly what it was, I was still pretty excited.  Here’s what I ordered:

IMG_6920

A new baby blanket pattern and yarn for our new arrival, and a set of kitchen cloths with toppers.  My hubby really likes the kitchen cloths, so I figured that it was time for me to learn how to make them myself.  The blanket is a knit entrelac pattern in vibrant colours.  I made an entrelac scarf back when I was in university, but it should be interesting to make it on a larger scale.

March break started for us this weekend, so I’m off for a whole week.  I’m hoping to finish a few things that I started so I can begin that blanket.  Once I get them done, I’ll show them to you!  One is a sharp crochet hook project that I’m quite excited about.  Enjoy the rest of your weekend, everyone!

S’Mores Brownies

Marshmallow, chocolate, graham wafers… how can you go wrong, really?

Bakerella had the recipe for these up on here website, and I knew that I had to try them.

You can follow the directions on her site, but here’s what I used for ingredients (I didn’t quite follow her list):

Ingredients

  • 1 cup margarine
  • 10 oz. chocolate chips
  • 1/2 cup sugar
  • 3/4 cup packed light brown sugar
  • 4 eggs
  • 2 tsp pure vanilla extract
  • 1 tsp salt
  • 1 1/3 cups flour
  • 3 Tbsp cocoa powder
  • 8 whole graham crackers, crushed in your hand
  • 12 regular size marshmallows

After I put the batter into a greased 9×13″ pan, I spread the marshmallows out over the top.

S'Mores Brownies

And then when the brownies came out of the oven, they looked like this:

Smores Brownies

I didn’t quite have the problem that Bakerella had of too much marshmallow.  But really, when is that ever a problem?

Smores Brownies

Next time, I will add more marshmallows, and I will cut them in half, so they spread out over the top of the brownies a little better.  Also, it could have used some more graham wafers, maybe just a couple.  Other than they, they were very yummy!