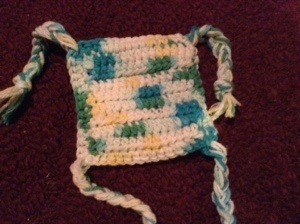
If you want to check out my first Craftsy pattern, you can do so here. It’s the pattern for an embroidered napkin I made for my mom… and it’s free!!! Enjoy! 🙂
Spicy Guacamole Burgers
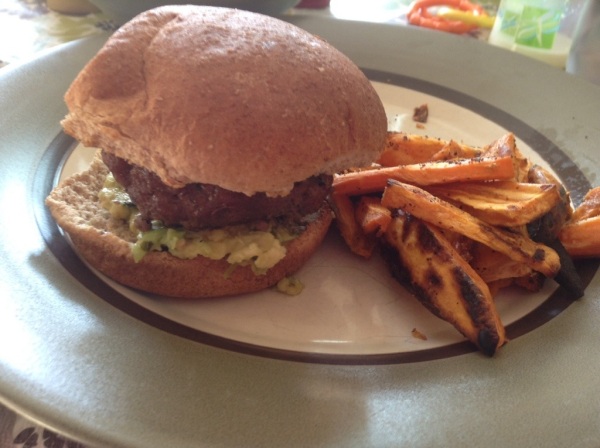
A&W has Spicy Guacamole Teen Burgers now. And they’re delicious. They also come in at over 600 calories before you get a root beer or French fries. I figured out that I could make my own, and maybe cut down on some of the calories.
According to myfitnesspal.com, these clock in at around 325 calories. It will obviously be more if you put cheese and whatnot on them. I like lettuce, tomato, and Dijon mustard. My 3-year-old likes ketchup. And where I was also making them for the boys, I made some for them first without the hot spices, and then added them for ours.
Spicy Guacamole Burger
Serves 6
In a bowl, mix together 1lb of lean ground beef, 1 clove of garlic, 1tsp of smoked paprika, 1tsp of cumin, 2 tbsp of cilantro, and a bit of salt and pepper. Mix together and form into six patties. While the burgers are cooking, you can mash together 1 ripe avocado, 1tbsp cilantro, 1tbsp lemon or lime juice, 1 clove of garlic, 1/4 tsp cayenne pepper, and a pinch of salt.
Throw it onto a whole wheat hamburger bun, and you’re good to go!
We had them with sweet potato fries. I bake them with a bit of salt, garlic powder, and oil at 425.
What do you like to eat on your burgers?
Homemade Iced Tea Recipe
You can now purchase large cans of iced tea where I live. They hold a little more than a 591mL bottle. My aunt, who watches her sugar, bought a couple of cans and brought them home. She then noticed how many calories and sugar were in them (it was a lot, something like 26g of sugar). So here’s a recipe for a sugar-free iced tea. If you do like it sweetened, honey or agave nectar can be added.
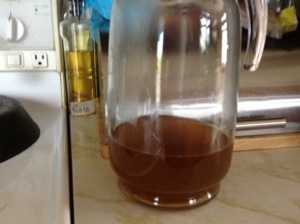
The first thing you’re going to do is to boil some water like you would normally do. I boiled about 4 cups of water. I then poured it over 4 tea bags, and I let it steep for at least 5 minutes. Try out different flavours of tea and see what you like. I’ve done passion fruit green tea, mint tea, and this morning I made lemon ginger. Remove the tea bags and pour into the pitcher that you’re going to use.
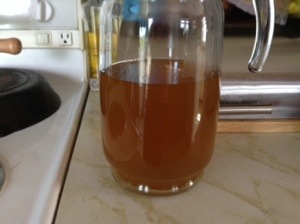
If you’d like to sweeten your tea, this is where you add the sugar. You want to sweeten it while it’s hot so the sugar dissolves. Next, add an equal amount of cold water.
Let it cool completely in the fridge. This final step is optional, but I like to pour my tea over ice until the glass is about 3/4 full, and then I top it off with club soda. Club soda is sugar free, but it adds some nice bubbles to your tea.
Now you can sit back, and enjoy your cool treat. Let me know if you think up some yummy flavour combinations. My husband makes a delicious one with orange pekoe tea and orange juice that definitely hits the spot. Cheers!
How to Frame Needlepoint
So after being told it was going to cost hundreds (that’s plural!!) to frame 2 cross stitch pieces, I decided to take matters into my own hands. It’s fairly easy, and doesn’t take that long to do. If you wish, you can wash your piece first. I use non-chlorinated bleach and warm water, and I wash it by hand. After rinsing, lay it flat to dry. Once it’s dry, you can iron on a low setting without steam. Iron all over the back, and go over the parts on the front that are free of stitches. If the front requires more ironing, you can lay a towel over the top.
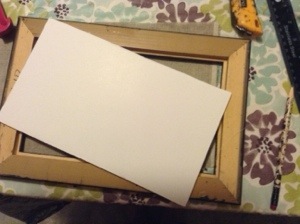
Next, cut some foam board the same size as the back of your frame. I take the back off and trace it.
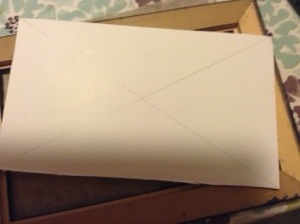
Take a ruler, and lay it diagonally from corner-to-corner. Do the other corners, making an ‘x’.
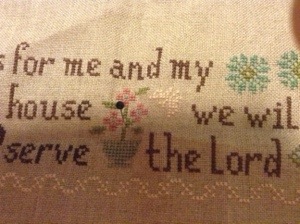
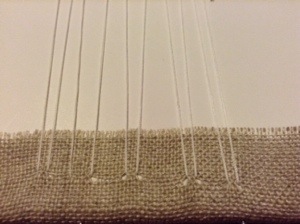
The centre of the x is the middle of the board. Find the middle of your piece of work, and stick a pin through the middle into the middle of your board. I like to use pins with the balls on the end for easy removal.
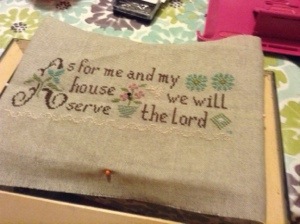
Stretch your work, and put a ball-topped pin on each side.
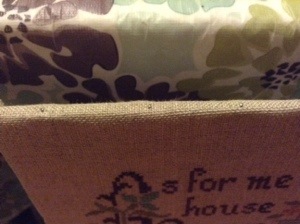
Now, you have two options. You’re going to stretch your work as you go, securing it with pins. If you want, you can just leave the pins in. If you want to do this method, use the type of straight pins with flat heads:
Your second option is to go all around your work with the ball-topped pins, and then use thread to tighten your work. For this method, you sew through a few spaces, pull tight, and repeat across the other side, moving back and forth across your work. Both methods work fine, it’s just a matter of preference.
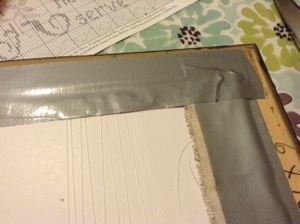
You may have an idea for something that looks a little prettier (I’m also going to shop around for a more neutral-coloured tape), but the last step is to tape around the foam board, attaching it to the back of the frame. If your frame has a back, it may not fit well over the board and cloth, so you’ll put the back in place, and then take the back to the back of the frame.
Attach any necessary hanging hardware, and you’re done!
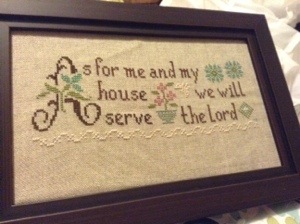
This piece is a housewarming gift for my parents-in-law. Next on my agenda is to frame the ones to go in the boys’ room. Hopefully before they move out.
*note – the cross stitch that I made is a Lizzie Kate pattern.
Frozen Cake Pops – Olaf and Snowy Mountains
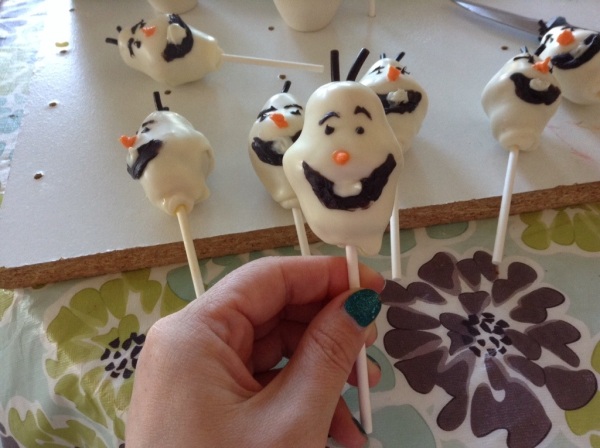
My friend’s little girl had her fourth birthday party yesterday, and the theme was ‘Frozen’. Here are the cake pops I made:
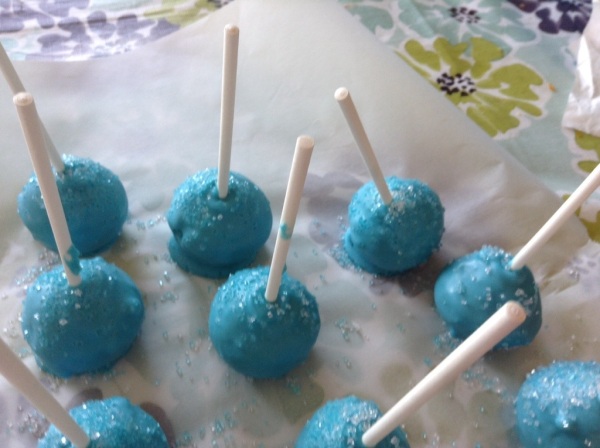
These were simple balls, dipped in blue chocolate, and then sprinkled with blue and white coarse sugar. When you make upside down pops, make sure the push them down onto the parchment paper, or you’ll get a tippy one like the one over on the right.
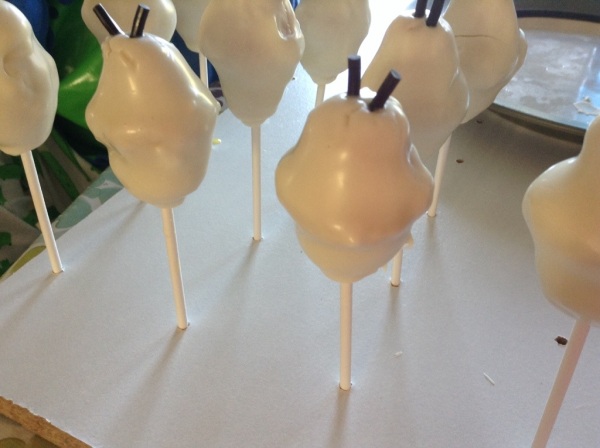
Now, here’s how to make Olaf. Make an oval, and then squish the ends to make the middle thicker through:
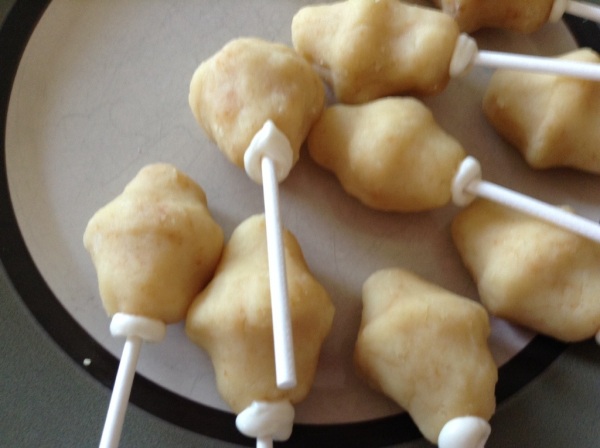
Then dip them in white chocolate. Immediately stick two small pieces of black licorice lace into the top for the hair. You’ll want to make sure to do this before the chocolate hardens.
In hindsight, if I had orange-coated sesame seeds, I would have used them for the nose. My orange wasn’t holding up. I you’ve got them, make sure to stick them in at the same time as you do the hair. After the chocolate dries, you can paint on eyes, eyebrows, and the mouth. If you’ve got candy eyes, feel free to use them. For the mouth, I painted the black first, and the painted the white tooth over top.
My chocolate was not cooperating (it was an older stash), so these could definitely be a little neater. But I still think that Olaf is pretty cute!
Cotton Star Baby Toy
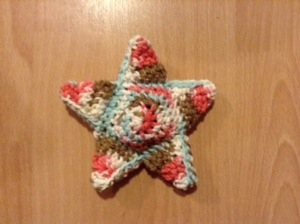
Here’s another baby toy made from cotton yarn!
I used a 5mm hook and Bernat Handicrafter cotton yarn.
Star Pattern
Make 2
Make a magic circle. In the centre of the circle, make 10sc. Join to first sc with a sl st, then ch 1.
Row 2 – make 2 sc in each sc. Join to first sc with a sl st. Ch 1. (20 sc)
Row 3 – make 2sc in first sc, then 3 sc, repeat around. Join to first sc with sl st. Ch 1. (25 sc)
Row 4 – make 2sc in first sc, then 4 sc, repeat around. Join to first sc with sl st. Ch 1 (30 sc)
This finishes the body of the star. Now we’ll make the points. You’ll make five altogether.
Row 1 – 6 sc, ch 1 turn.
Row 2 – sc2tog, sc 5, ch 1, turn.
Repeat for 4 more rows, decreasing by 1 sc each time. When you get to one st, you’ll make sl st all down the arm until you get to the body again, where you’ll repeat to make 4 more arms.
When you finish with the last arm, finish off, leaving a long tail for sewing.
Finishing
Hold the two wrong sides together, and whipstitch around. Leave a gap for stuffing with polyester fibre fill, or scrap yarn or fabric. I also put two jingle bells inside. Finish stitching, and then tie the ends and cut them. Then give them to a happy baby!
Banana Custard Recipe (and creme brûlée)
I had some eggs that needed to be used up. My baby is 8 months old, so I figured that he’d enjoy some custard. Here’s the recipe that I used (this makes about five cups. It can easily be halved):
Banana Custard Recipe
In a saucepan, mix together 1/2 cup sugar, 3 cups milk, 2 tbsp cornstarch, and a pinch of salt. Cook over a medium-high heat until it starts to thicken, then turn to low and cook for 2 minutes. Make sure to keep stirring so it doesn’t stick to the bottom of your pot. Separate six eggs, and set aside the whites. Lightly beat the yolks. Add a bit of the milk mixture to the eggs to temper, and then pour the egg mixture into the pot. Turn the pot back up to medium and bring to a boil. Cook for two minutes, stirring constantly. Take off the heat and add 2 tsp of vanilla. Pour into a bowl, put a layer of Saran Wrap on the top, and place in the fridge to cool for at least an hour. Just before you are ready to serve, fold in 2 bananas. Because I was making this for my kids, I puréed the bananas first. You could slice them if you were serving it to a crowd with teeth.
*Note – because I was making this for little ones, I cut the sugar in half. If you like sweet custard, you could put a full cup in. I found it plenty sweet, especially with the bananas.
I gave my husband a creme brûlée torch for Christmas last year, and he broke it out tonight. He took some of the custard and put it in a creme brûlée dish, sprinkled a little sugar over top, and then burnt the top with a butane torch.
Now… What to do with those whites? I preheated my oven to 350, and greased 4 spots in a muffin tin. I put water in the empty spaces. I then added mushrooms, ham, and cheddar cheese to the bottom of the tin, and then poured the egg whites over top. I cooked them for about 20 minutes, and then had a delicious breakfast!
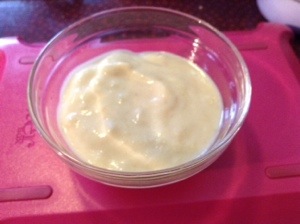
I’ve only got a picture of the custard… The creme brûlée didn’t last long, and I wasn’t thinking in the morning to take a picture of the egg ‘muffins’. What do you like to make with eggs?
Tassels Baby Toy
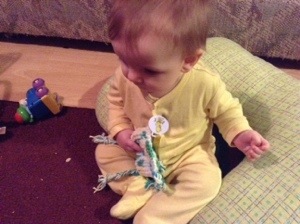
I made my baby a new hat last week. His favourite part are the tassels. He often has the hat pulled off, and the tassels in his mouth. I decided to make him a toy.
I used a 4.5mm hook, and Bernat Handicrafter yarn. When the toy gets full of baby drool, it can be thrown in the washing machine with my other dishcloths and towels!
Ch17. Insert your hook into the 3rd chain from the beginning, and make 15hdc across. Ch2, turn. Make 10 total rows of 15 hdc, then bind off.
Make a second square the same size, but don’t bind off. Hold the wrong sides together, then sc all around to attach the two squares together, putting three scs at the corners. Bind off.
Make 24 long lengths of yarn, probably around 8 inches. Take six of each and pull them through the corners. Braid and then tie off the ends. Give it to a teething baby, and make them very happy!
How to Make Chocolate-Dipped Bacon Roses
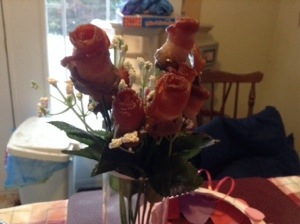
That’s right. These happened in our house today. There are just some times that you need to tell that special someone in your life that you love them more than bacon.
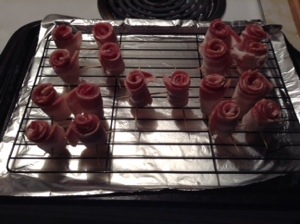
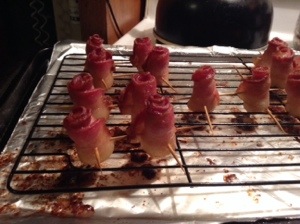
The first thing you need to do is to preheat your oven to 375. Line a baking sheet with foil, and put a rack on top of that. Next, begin to roll your bacon. I rolled them so the fatty side was on the bottom. The tighter it is, the better it will look. Stick toothpicks though the bottom of the roses to hold them together, and also to keep them from falling over.
Bake them for about 20-25 minutes. Take them out, and blot them on paper towel to remove any extra grease.
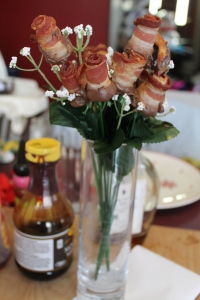
Prepare your roses by popping the flower petals off of them stem. Keep the green flower base, because that will hold your bacon rose.
Next, melt some chocolate. I used to light chocolate melting wafers. For these ten roses, it only took about a quarter cup of wafers. Dip the ends of your roses in the chocolate. I then placed them on a sheet of parchment paper to let the chocolate set slightly, for about two minutes. Then I pushed them onto the ends of the stems. Delicious!
Lovable Lion Hat
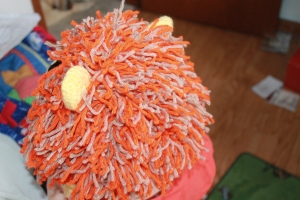
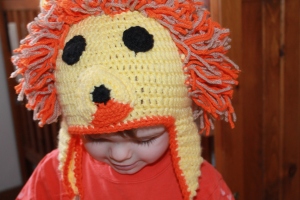
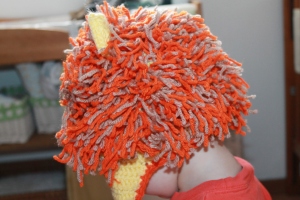
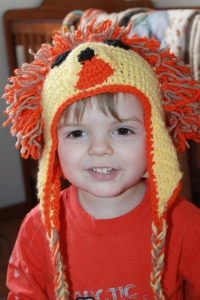
Here is the hat that my three-year-old requested.
He likes to ROAR while he’s wearing it. I also happen to think that he looks a little like a shag carpet running around while he’s wearing it, but that’s neither here nor there.
Lion Hat – would probably fit up to 5T, he’s got a rather large head. You can adjust the width or length accordingly to make it fit any size head. I used Impeccable by Loops and Threads, and a 4.5mm hook.
Ch 4. Insert hook into first ch, and join together with sl st. Ch 3.
In the circle you just made, make 10dc. Join to first dc with sl st, ch 3.
Make 2 dc in each dc (20 dc), join to first dc with a sl st, ch 3.
2 dc in first dc, 1 dc in next. Repeat until you reach the end of the row (30 dc). Join to first dc with sl st, ch 3.
Keep adding 10 dc each time until you get to row 8, with 80dc. Make six more rows. Finish by joining to first dc with a sl st. If you are making earflaps, continue on. If not, bind off.
EarflapsAfter joining to first st with a sl st, ch 1. Make 15 sc across. Ch 1, turn.
Sc2tog, sc across until last two sc, sc2tog.
Continue in this fashion, decreasing by two sc each row until you get to 3 sc.
Sc2tog, sc. Ch 1, turn.
Sc2tog, bind off.
Repeat instructions for second earflap halfway across the hat (skipping approximately 25 st).
When finished, go around the hat with a single row of sc in orange.
Eyes – I’m not 100% satisfied with the eyes… I may change them. But here’s what I did:Make 2
Ch 4, join to first ch with a sl st. Ch 1
In circle created with the ch, make 8 sc. Join to first sc with sl st, ch 1.
Make 2sc in each sc. Join to first sc with sl st, bind off, leaving a long tail for attaching to the hat.
Muzzle
With black, ch 4. Join to first st with sl st, ch 1.
Make 8 sc in centre of circle. Join to first sl st, and change colour to main colour of hat.
Make 2 sc in first 6 sc. Ch 1, turn.
Make 2 sc in first sc, 1 sc in second. Repeat 5 more times. Ch 1, turn.Make 2 sc in first sc, then two sc. Repeat 5 more times. Ch 1, turn.
Sc across. Break yarn.
Join orange onto the bottom part of the black. Make 2 sc in each of the two remaining black st. Ch 1. When you turn, put your hook through the yellow part, as well.
2 sc in first sc, 1 sc. Repeat. Ch 1, join in with the yellow, turn.
2 sc in first sc, 2 sc. Repeat. Ch 1, join in with the yellow, turn.
Sc across remaining orange st. Join with the yellow. Break yarn.
When attaching the muzzle to the hat, allow it to puff out, and stuff with fibre fill or scrap yarn.
Ears (make 2)
Ch 4, join to first ch with sl st. In the circle, make 8 sc.
Sc 2 in first 2 sc, 2 hdc in next 4 sc, then 2 sc in last 2 sc. Join with sl st. Ch 1.
2sc, sc, 2sc, sc, 2sc, sc, 2hdc, hdc, 2hdc, hdc, 2sc, sc, 2sc, sc, 2sc, sc. Join with sl st. Break yarn. Make a second ear the same way. Hold the two wrong sides together, and then sc around.
Mane
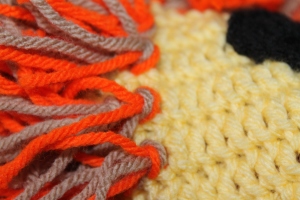
Make a few hundred 5 inch lengths of orange and tan. What I did was wrap yarn around a playing card, and then snipped along the bottom to make sure they were all about the same length. I hooked two strands of yarn in around the dc, and then pulled the yarn through the loop that was created. If you’re familiar with latch-hooking, that’s how I did it. Hopefully the picture will help you understand:
Then you need to tie other pieces of mane in all around the hat.
And hopefully you’ll have a happy customer! The extra yarn keeps him pretty toasty as he’s running around outside.
If you try this pattern out, please let me know if there is anything missing, or any inconsistencies! Please feel free to make and sell items using my patterns, but do not publish them as your own or sell them. If you make it, and feature it on your website, please send them back to my site for the original. Thank you!
